Customize the Discover view
Elastic Cloud Serverless projects are autoscaled environments, fully managed by Elastic and available on Elastic Cloud. Availability This functionality is generally available and ready for production usage. Serverless interfaces and procedures might differ from classic Elastic Stack deployments. The Elastic Stack includes Elastic's core products such as Elasticsearch, Kibana, Logstash, and Beats. Availability This functionality is generally available and ready for production usage. Unless stated otherwise on the page, this functionality is available when your Elastic Stack is deployed on Elastic Cloud Hosted, Elastic Cloud Enterprise, Elastic Cloud on Kubernetes, and self-managed environments. This documentation corresponds to the latest patch available for each minor version. If you're not using the latest patch, check the release notes for changes.
Serverless
Generally available
Stack
Generally available
If the default Discover view doesn't show what you need, you can change which areas are visible, how the document table looks, and how documents are sorted and filtered, so the data that matters most stays in front of you. Discover keeps the size and visibility of its areas in your browser. Table settings such as density, row height, sample size, sort order, and column widths are stored with a Discover session when you save it.
Discover adapts its layout to the type of data that you explore, such as logs or metrics. Refer to How Discover works. Your customizations apply on top of that layout.
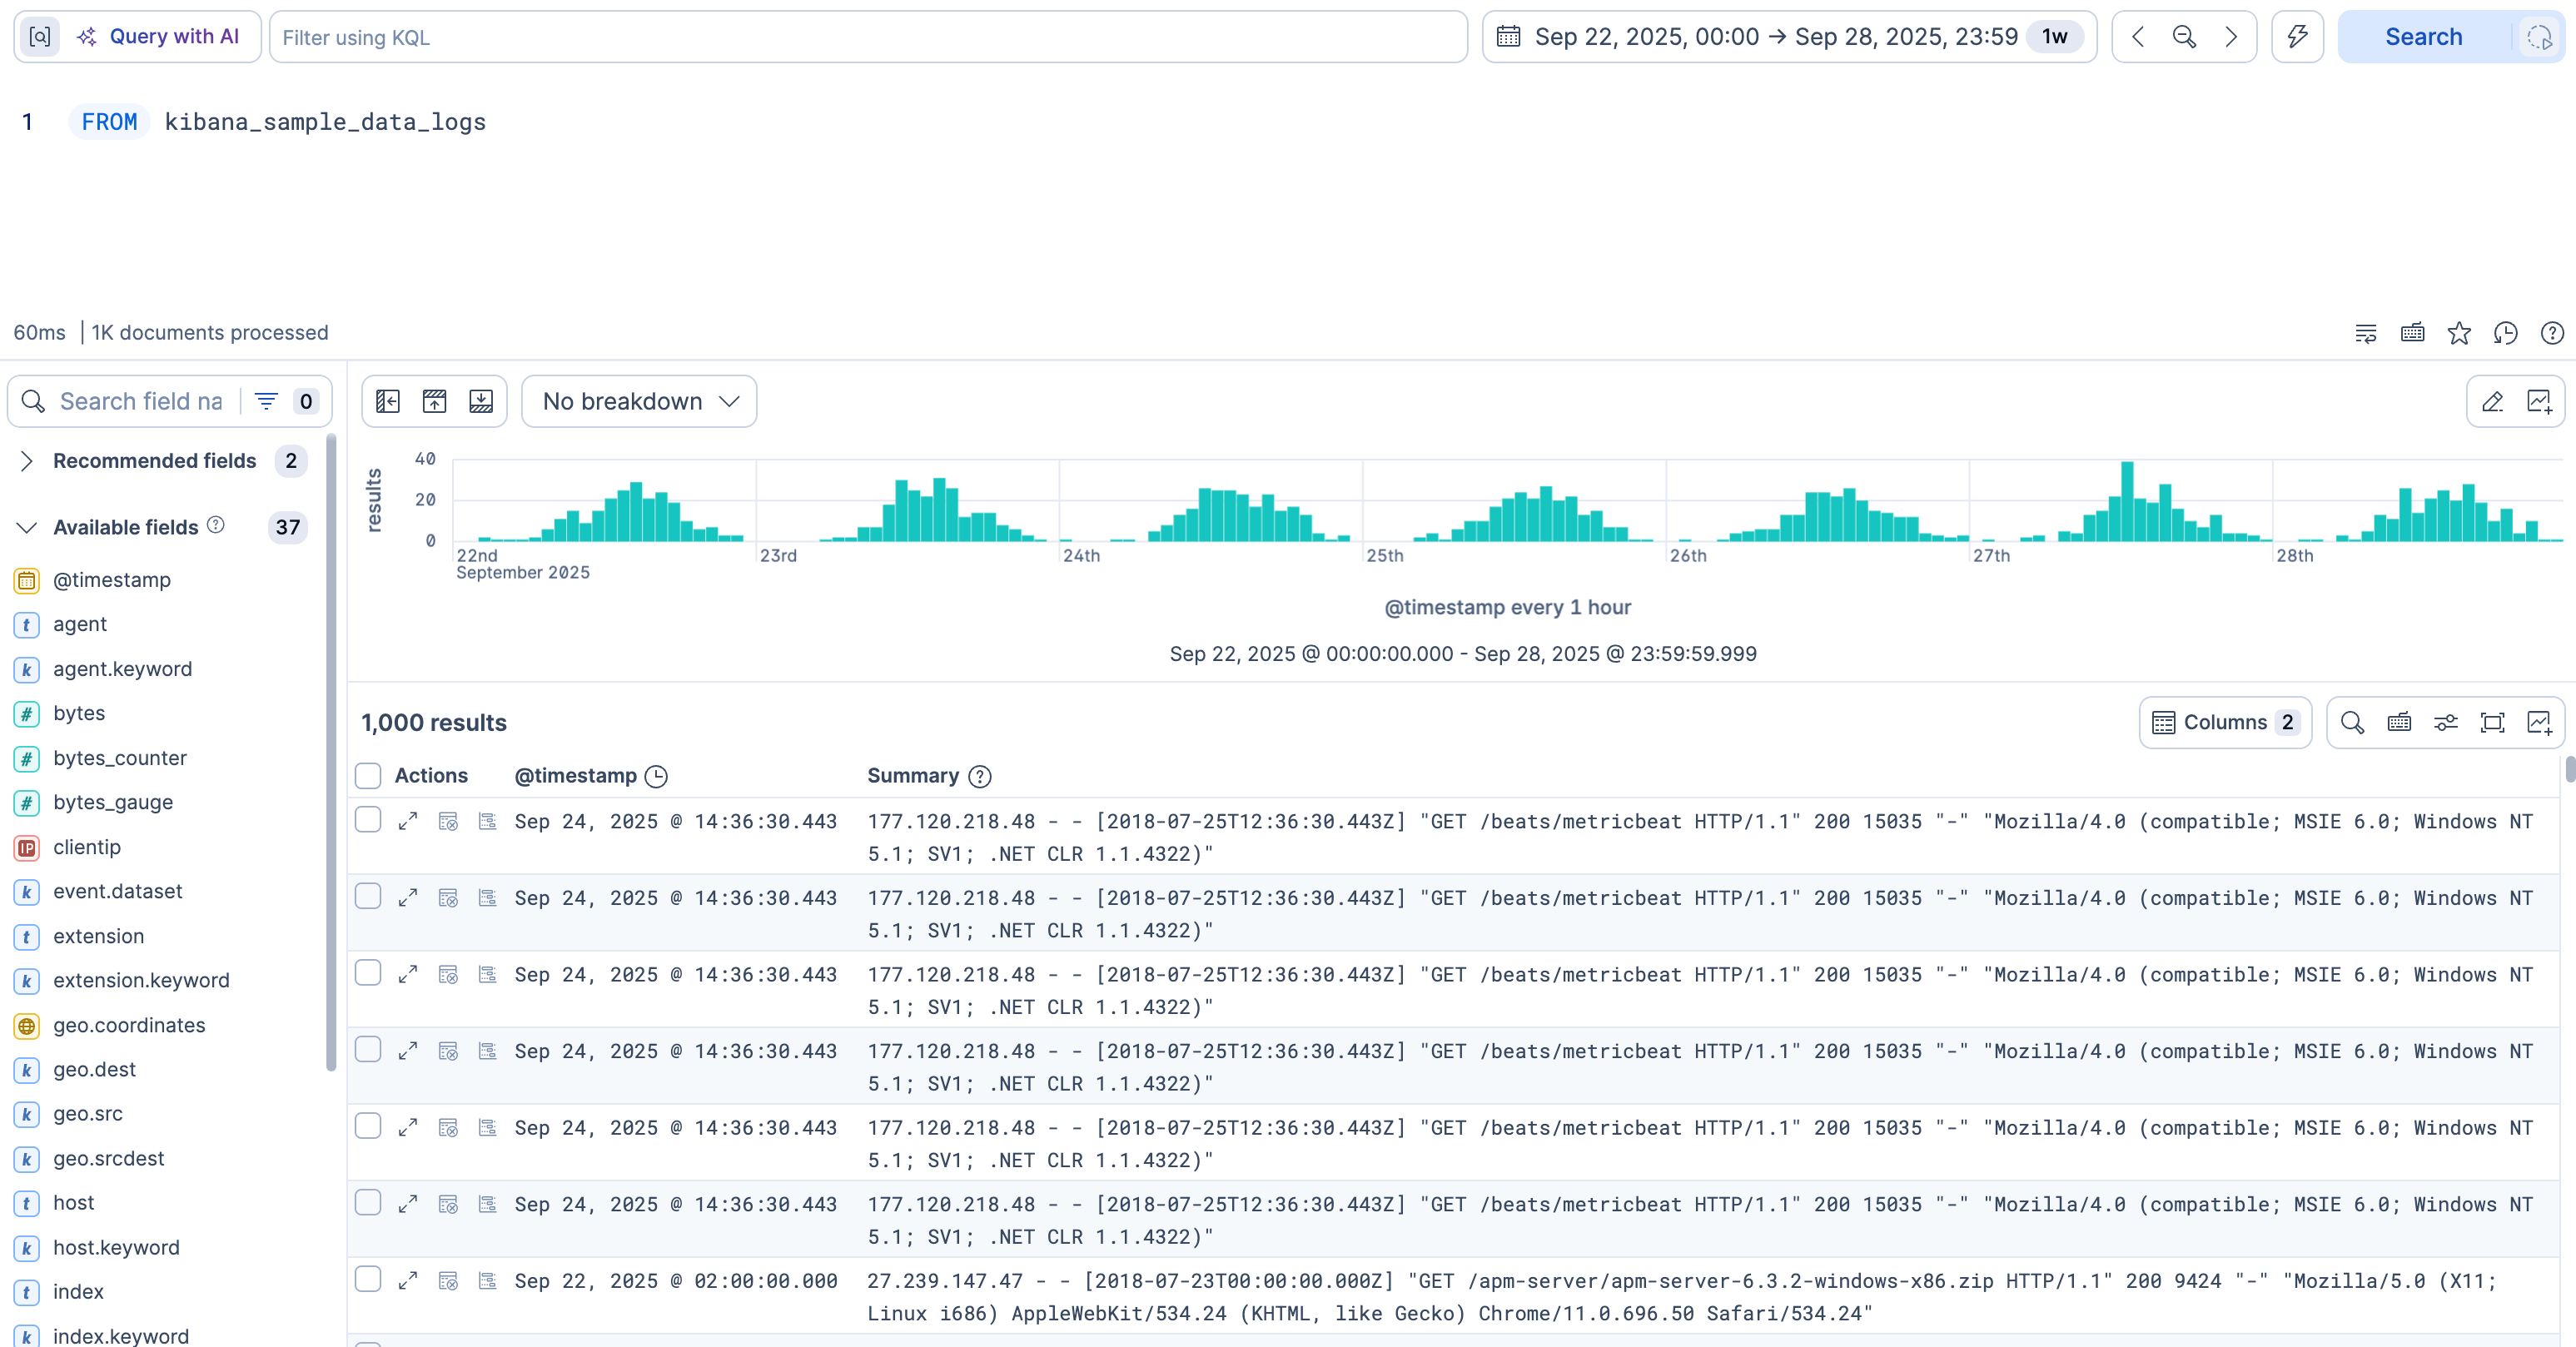
Open Discover and run a query that returns results. To keep a customization with your work, save the session. Saving needs the All privilege for Discover. Refer to Save and manage Discover sessions.
To make room for the part of Discover you're working in, show or hide areas, or resize them.
- To show or hide areas of the Discover view:
-
Elastic Cloud Serverless projects are autoscaled environments, fully managed by Elastic and available on Elastic Cloud.
Availability
Generally available
This functionality is generally available and ready for production usage.
Serverless interfaces and procedures might differ from classic Elastic Stack deployments.
The Elastic Stack includes Elastic's core products such as Elasticsearch, Kibana, Logstash, and Beats.
Availability
Generally available since 9.4
This functionality is generally available and ready for production usage.
Unless stated otherwise on the page, this functionality is available when your Elastic Stack is deployed on Elastic Cloud Hosted, Elastic Cloud Enterprise, Elastic Cloud on Kubernetes, and self-managed environments.
This documentation corresponds to the latest patch available for each minor version. If you're not using the latest patch, check the release notes for changes.
Use the Panels visibility button group to show or hide areas of Discover independently. The chart and the results table can't both be hidden, so one of them always stays visible.
- / to show or hide the chart
- / to show or hide the results table
- / to show or hide the fields list in the sidebar
- The Elastic Stack includes Elastic's core products such as Elasticsearch, Kibana, Logstash, and Beats. Availability Generally available from 9.0 to 9.3 This functionality is generally available and ready for production usage. Unless stated otherwise on the page, this functionality is available when your Elastic Stack is deployed on Elastic Cloud Hosted, Elastic Cloud Enterprise, Elastic Cloud on Kubernetes, and self-managed environments. This documentation corresponds to the latest patch available for each minor version. If you're not using the latest patch, check the release notes for changes. Use the Panels visibility buttons or the collapse and expand button in the corresponding area to show or hide the chart and the fields list in the sidebar.
-
Elastic Cloud Serverless projects are autoscaled environments, fully managed by Elastic and available on Elastic Cloud.
Availability
Generally available
This functionality is generally available and ready for production usage.
Serverless interfaces and procedures might differ from classic Elastic Stack deployments.
The Elastic Stack includes Elastic's core products such as Elasticsearch, Kibana, Logstash, and Beats.
Availability
Generally available since 9.4
This functionality is generally available and ready for production usage.
Unless stated otherwise on the page, this functionality is available when your Elastic Stack is deployed on Elastic Cloud Hosted, Elastic Cloud Enterprise, Elastic Cloud on Kubernetes, and self-managed environments.
This documentation corresponds to the latest patch available for each minor version. If you're not using the latest patch, check the release notes for changes.
Use the Panels visibility button group to show or hide areas of Discover independently. The chart and the results table can't both be hidden, so one of them always stays visible.
- Adjust the width and height of each area by dragging their border to the size you want.
Result: The areas you changed stay that way. Discover saves the size and visibility of each area in your browser for the next time you open it. When you save a Discover session, it also stores whether the chart is hidden.
Change the appearance of the document table and its contents so the data that matters stands out. Each of the following sections is a separate task.
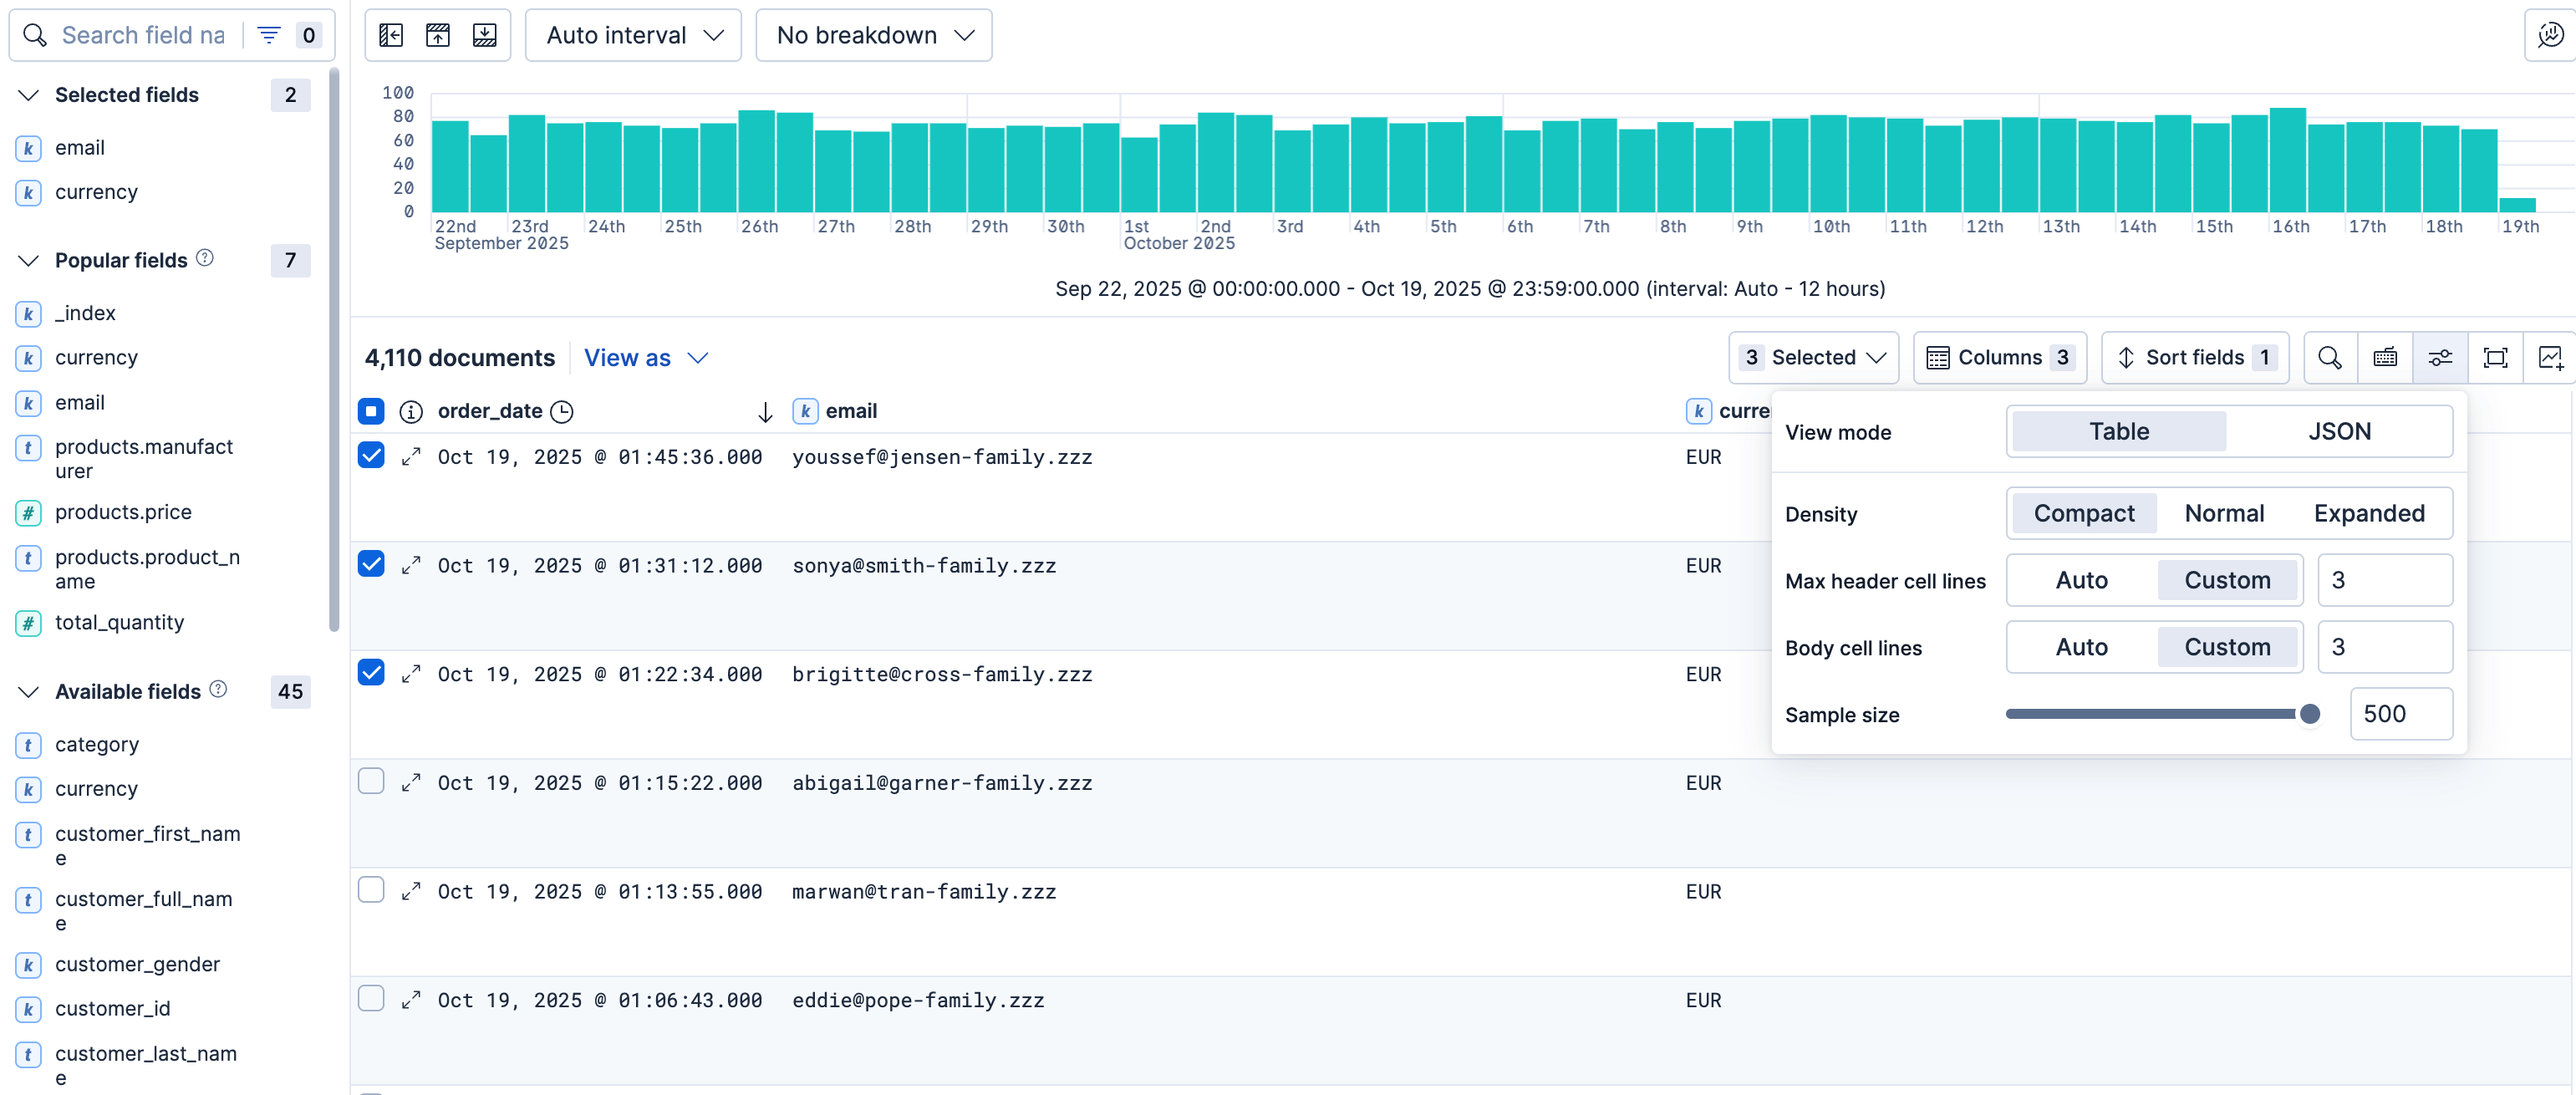
Elastic Cloud Serverless projects are autoscaled environments, fully managed by Elastic and available on Elastic Cloud. Availability Generally available This functionality is generally available and ready for production usage. Serverless interfaces and procedures might differ from classic Elastic Stack deployments. The Elastic Stack includes Elastic's core products such as Elasticsearch, Kibana, Logstash, and Beats. Availability Planned We plan to add this functionality in a future Elastic Stack update. Subject to changes. Unless stated otherwise on the page, this functionality is available when your Elastic Stack is deployed on Elastic Cloud Hosted, Elastic Cloud Enterprise, Elastic Cloud on Kubernetes, and self-managed environments. This documentation corresponds to the latest patch available for each minor version. If you're not using the latest patch, check the release notes for changes. To inspect documents as a tree, set View mode to JSON. Refer to View documents as JSON.
To put the most important fields first and give each one the width it needs:
- To move a single column, drag its header and drop it to the position you want. You can also open the column's contextual options, and select Move left or Move right.
- To move multiple columns, select Columns. In the pop-up, drag the column names to their new order.
- To resize a column, drag the right edge of the column header until the column is the width that you want.
Result: The table shows the columns in the new order and width.
Column widths are stored with a Discover session. When you add a Discover session as a dashboard panel, it appears the same as in Discover.
Elastic Cloud Serverless projects are autoscaled environments, fully managed by Elastic and available on Elastic Cloud. Availability Generally available This functionality is generally available and ready for production usage. Serverless interfaces and procedures might differ from classic Elastic Stack deployments. The Elastic Stack includes Elastic's core products such as Elasticsearch, Kibana, Logstash, and Beats. Availability Planned We plan to add this functionality in a future Elastic Stack update. Subject to changes. Unless stated otherwise on the page, this functionality is available when your Elastic Stack is deployed on Elastic Cloud Hosted, Elastic Cloud Enterprise, Elastic Cloud on Kubernetes, and self-managed environments. This documentation corresponds to the latest patch available for each minor version. If you're not using the latest patch, check the release notes for changes. Density and the header and body row height apply to the column layout. They aren't available in JSON view.
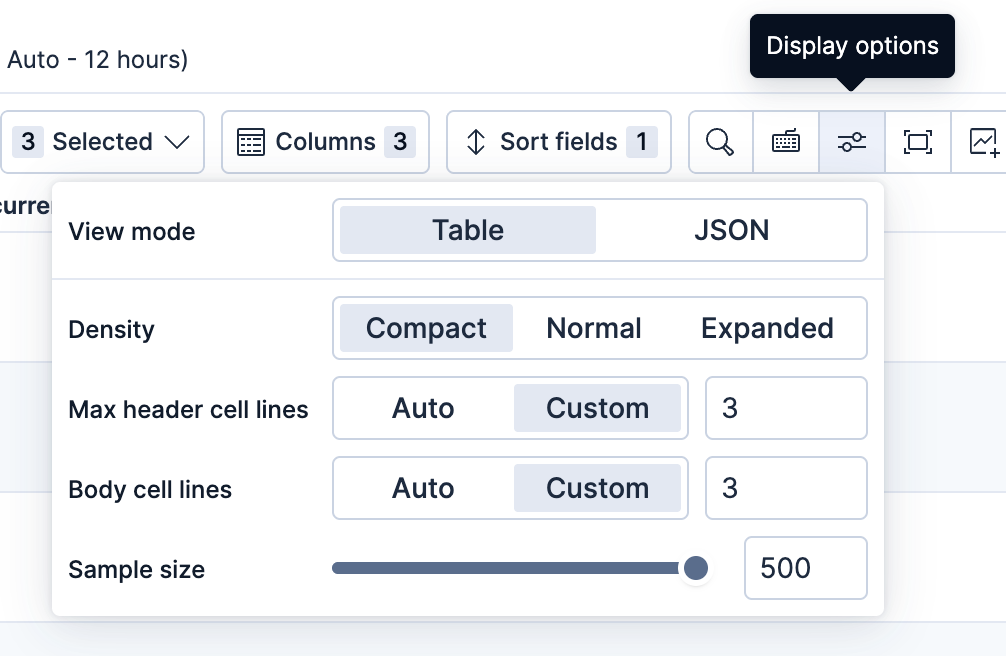
To fit more rows on screen, or to give each row more room, open Display options in the table toolbar and change Density.
Result: The table rows use the density you selected.
To control how many lines of text each header or body cell shows, open Display options in the table toolbar. Set Max header cell lines and Body cell lines to Auto to fit the contents, or to Custom and enter a line count. A custom header can show up to 5 lines, and a custom body cell can show up to 20 lines.
Result: The table cells show up to the number of lines you set.
To load fewer documents into the table, or to keep the number of results manageable, set the sample size. In classic mode, when the number of results returned by your search query (displayed at the top of the Documents tab) is greater than the value of discover:sampleSize, the table shows only that many results by default. To change the initial sample size for searches, open Display options in the table toolbar and enter any number between 10 and the lower of discover:sampleSize and 10,000. The setting is 500 by default. The Sample size option isn't available in ES|QL mode. In ES|QL mode, the LIMIT command in your query sets how many rows the table loads. Refer to Row and column limits.
When your search matches more documents than the table loaded, the last page shows a message that the results are limited. From that message, you can select Load more to continue exploring. Load more is unavailable while auto-refresh is on.
Sort the data by one or more fields, in ascending or descending order. In classic mode, the default sort is based on the time field, from new to old. In ES|QL mode, the query sets the order of the results. Sorting in the table reorders only the rows that are loaded and doesn't change the query.
To add or remove a sort on a single field, select the column header, and then select the sort order.
To sort by multiple fields:
Select the Sort fields option.
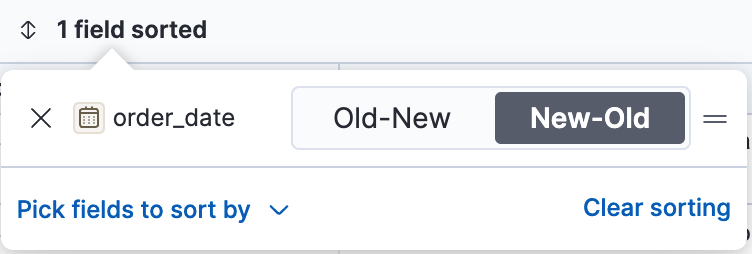
To add fields to the sort, select their names from the dropdown menu. By default, columns are sorted in the order they are added.
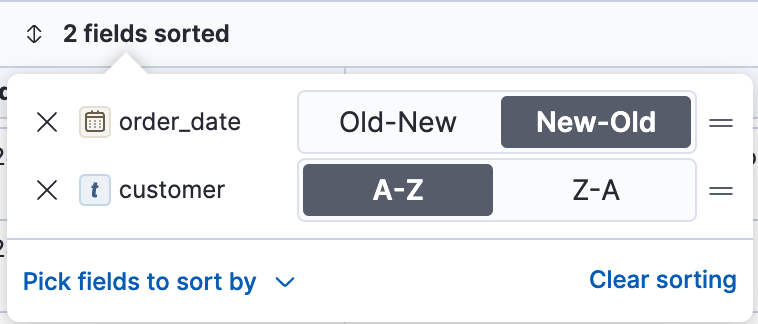
To change the sort order, select a field in the pop-up, and then drag it to the new location.
Result: The table rows follow the sort you set.
To change how Kibana displays a field, such as its name or format:
- Select the column header for the field, and then select Edit data view field.
- In the Edit field form, change the field name and format. For detailed information on formatting options, refer to Format data fields.
Result: The table shows the field with the new name or format.
Narrow your results to a subset of documents so you're comparing the data of interest.
- Select the documents you want to compare.
- Select the Selected option, and then select Show selected documents only (Show selected results only in ES|QL mode).
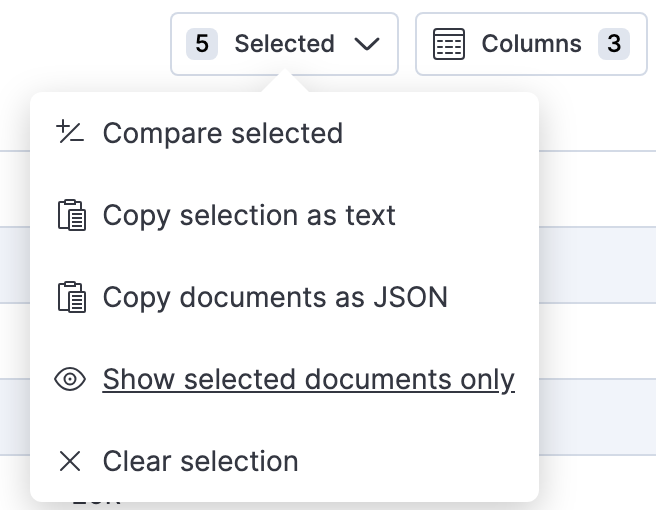
Result: The table shows only the documents you selected.
To compare field values across documents, refer to Compare documents in Discover.
To see more or fewer results at a time, use the Rows per page menu. The default is 100 results per page. To change the default for everyone who uses the space, set discover:sampleRowsPerPage in Advanced Settings.
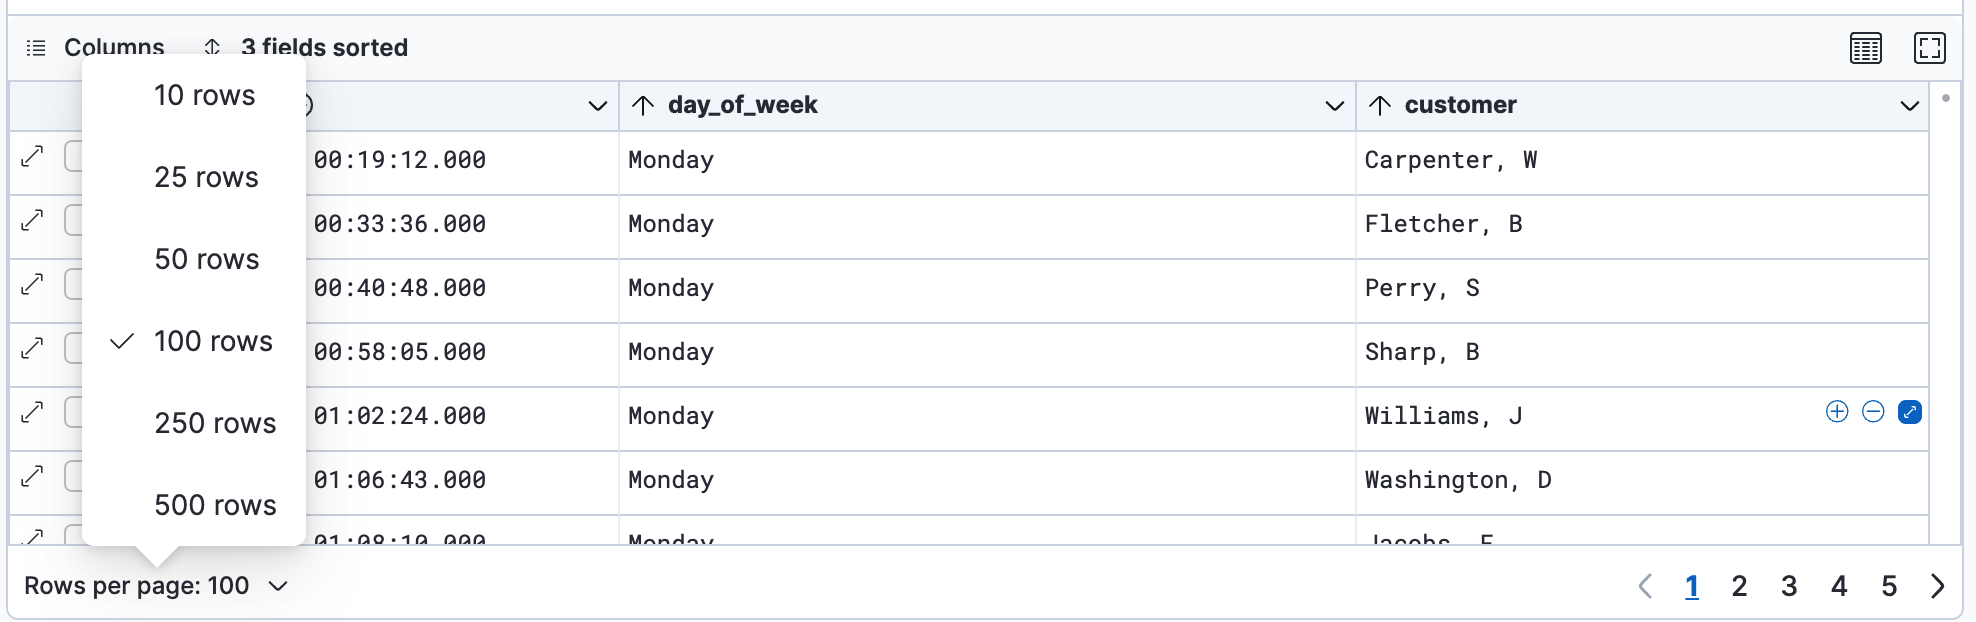
Result: The table shows the number of results you selected on each page.
Elastic Cloud Serverless projects are autoscaled environments, fully managed by Elastic and available on Elastic Cloud. Availability This functionality is generally available and ready for production usage. Serverless interfaces and procedures might differ from classic Elastic Stack deployments. The Elastic Stack includes Elastic's core products such as Elasticsearch, Kibana, Logstash, and Beats. Availability We plan to add this functionality in a future Elastic Stack update. Subject to changes. Unless stated otherwise on the page, this functionality is available when your Elastic Stack is deployed on Elastic Cloud Hosted, Elastic Cloud Enterprise, Elastic Cloud on Kubernetes, and self-managed environments. This documentation corresponds to the latest patch available for each minor version. If you're not using the latest patch, check the release notes for changes.
Serverless
Generally available
Stack
Planned
Planned
JSON view shows each document as a collapsible tree in the table. Use it to inspect nested fields, copy a value or the whole document, and filter without opening the flyout.
Open Display options in the table toolbar, then set View mode to JSON. If you add fields to the table, the tree shows only those fields. If you don't, it shows the document's fields without metadata fields, such as _id and _index, and without multi-fields, such as .keyword fields.
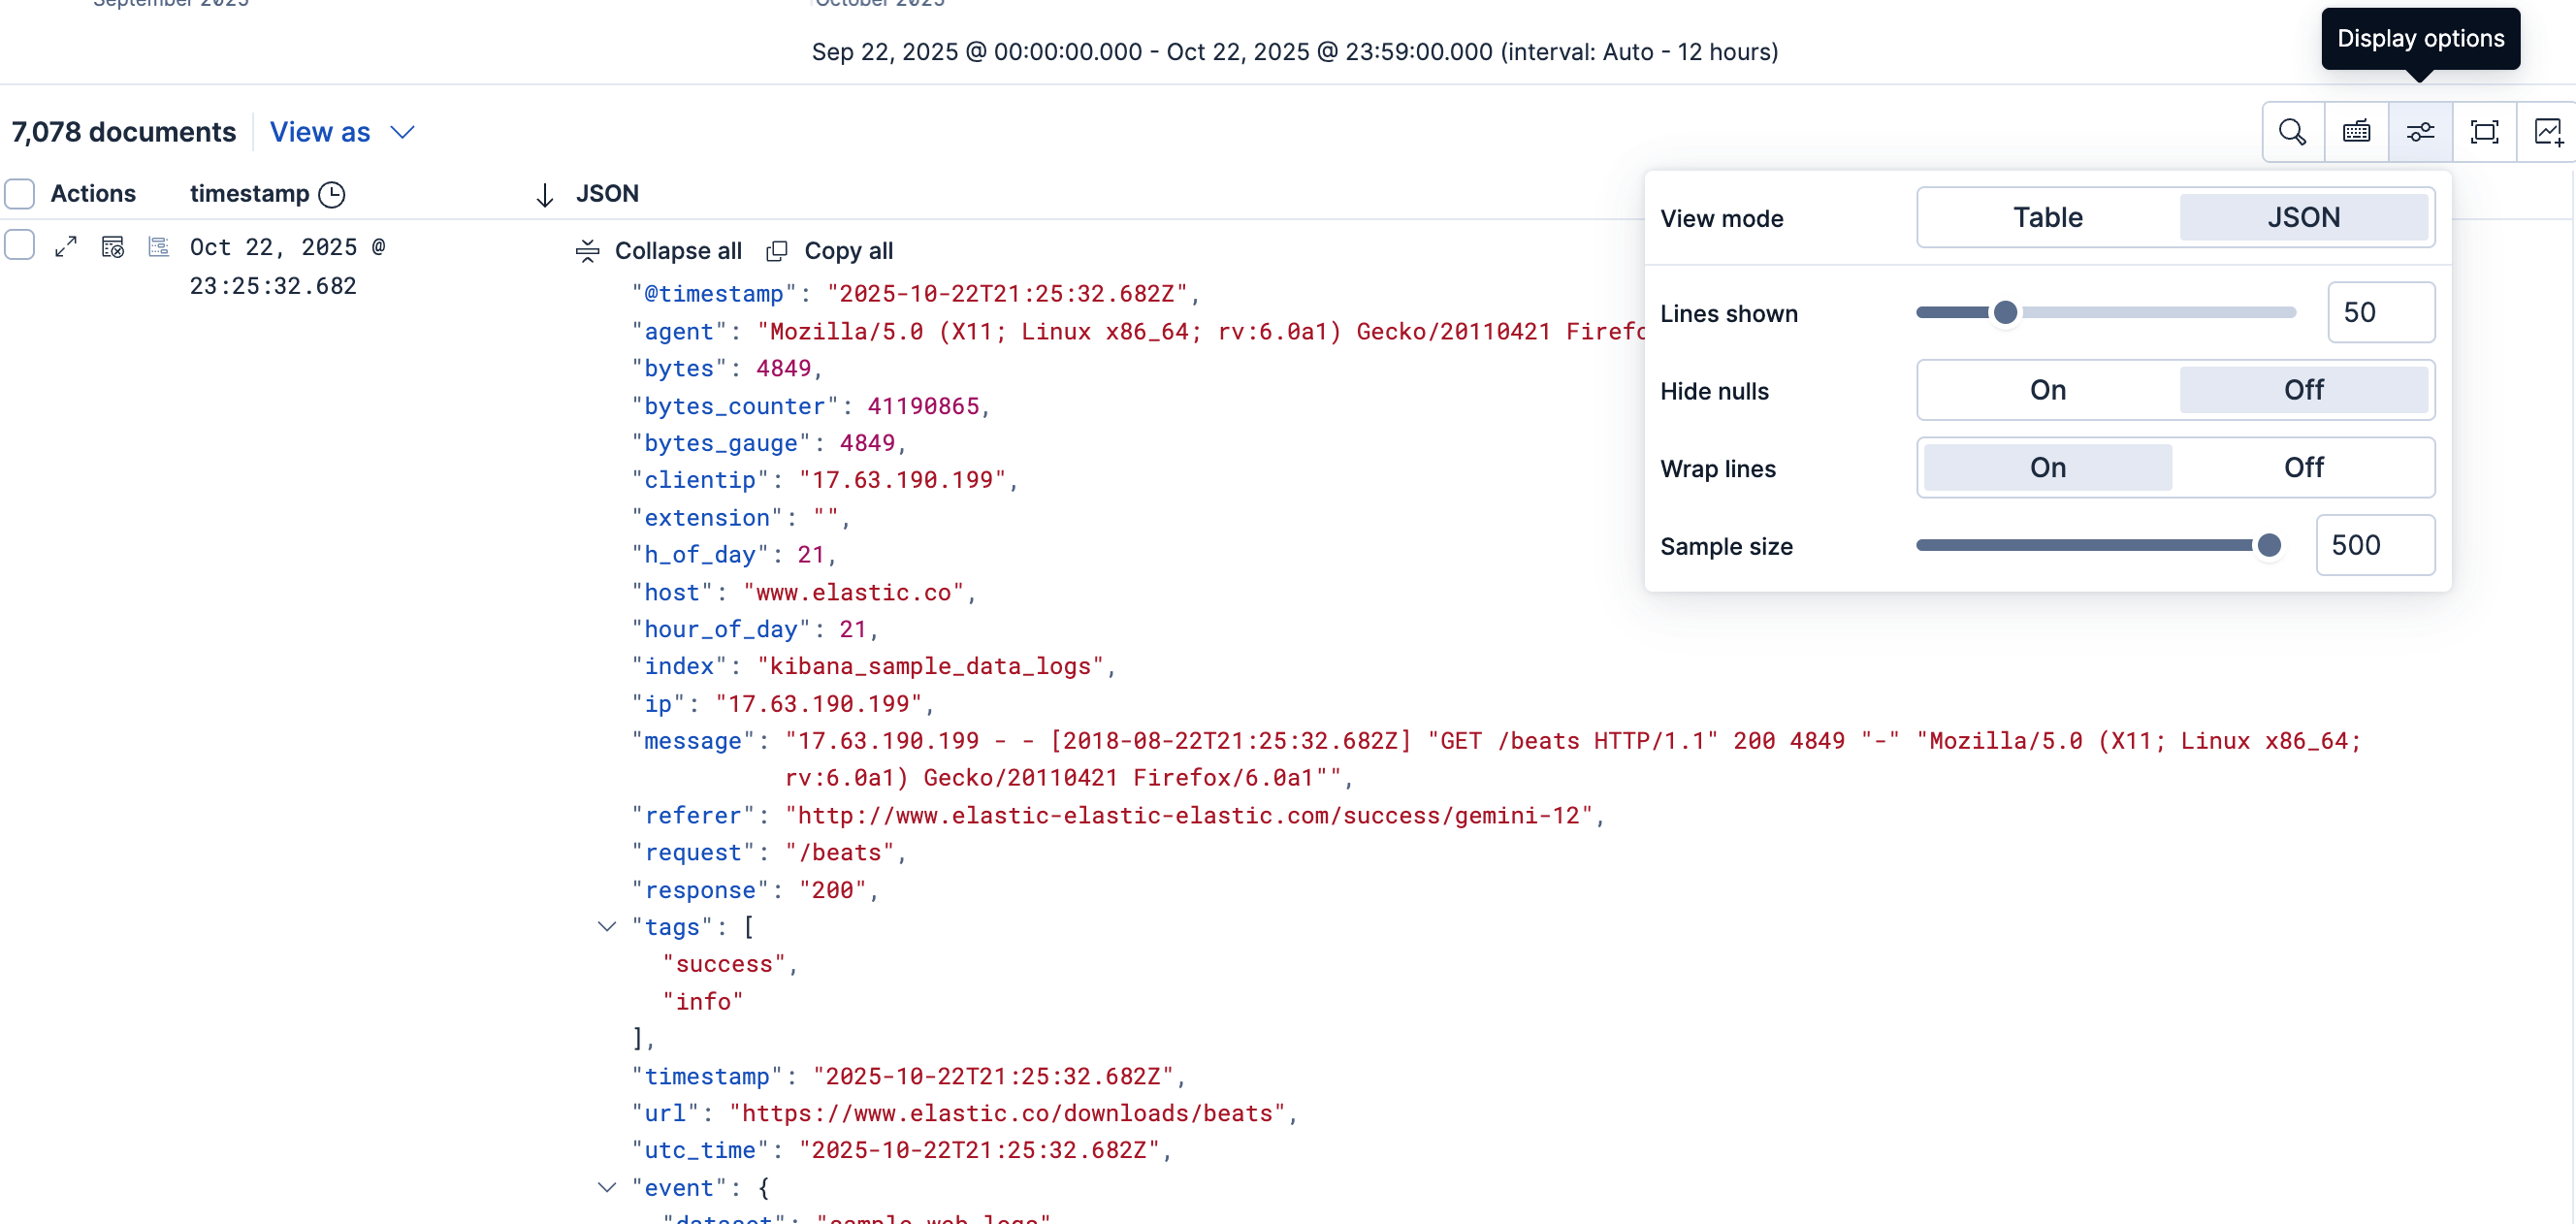
Use Expand all and Collapse all to open or close nested objects and arrays. Hover a field or value to copy it, or to filter for or filter out that value. Select Copy all to copy the document as JSON. To open or close one object or array, select it. To expand every nested level under it at once, hold Command (or Ctrl) while you select it.
Use Display options to change how each tree looks, and how many documents the table loads:
- Lines shown: How much of the tree is open in each cell. The range is 10 to 200. The default is 50.
- Hide nulls: When On, Discover omits null values from the tree. The default is Off.
- Wrap lines: When On, long values wrap onto more lines. When Off, each value is truncated to one line. The default is On.
- Sample size: How many documents the table loads. This option isn't available in ES|QL mode. To page through one document and the documents around it, use the document flyout.
You can't filter on values Elasticsearch ignored at index time, or on values inside a JSON string that Discover expanded in the tree. If a document is too large to render in full, Discover shows a warning and displays the first 10,000 values.
To go back to columns, set View mode to Table. You can then change Density and header and body row height.
If you save the session in JSON view, you get the same tree and the same Lines shown, Hide nulls, and Wrap lines values when you open it again. A dashboard panel from that session, or from Save table to dashboard, looks the same.
Result: In JSON view, the table shows each document as a tree with your display options.
- Save and manage Discover sessions: Keep your table layout with a saved session.
- Use Discover sessions in dashboards: Show the table on a dashboard.